shabby background

Monday, August 3, 2020

Handmade For You: August - December 2020 Mini Catalog

It's here, it will be available - LIVE TOMORROW, August 4th: the "Handmade For You" Mini Catalog!  Do you need a catalog of your very own?

Here's a sneak peek of just one of the new product lines: the POINSETTIA PLACE SUITE COLLECTION which includes not only the POINSETTIA PLACE DESIGNER SERIES PAPER (DSP) but also the POINSETTIA PETALS stamp set,  POINSETTIA DIES, PLUSH POINSETTIA SPECIALTY PAPER, BEADED PEARLS, and REAL RED 3/8" (1 CM) SHEER RIBBON.

My first card features the  new RED VELVET PAPER PACK.  Stampin' Up introduced a velvet paper last year in White; this is a fun option for creating a great holiday look to your Winter cards.  I used the Poinsettia Dies to emboss the veins in both the flower and the leaves & cut out each piece.  I've used some holiday  paper from last year as my background plus the new BALMY BLUE GLIMMER PAPER, plus Mossy Meadow, Real Red, & Whisper White cardstocks,  Each piece & layer of the Poinsettia was hand-shaped & adhered together, then adhered to a piece of thick Vellum.  This card front was then adhered to Whisper White Thick cardstock.  I love the texture and dimension of this card!


My next card came as I took a peek to see what other Demonstrators were doing with this set, this is my creation.  I've gold embossed on Very Vanilla cardstock using the Poinsettia Stamp set & die cut using the Poinsettia Dies.  Net, I shaped the flowers/leaves and created the center by using the Dark Mango Melody Blends to color pearls and adhering them to my Poinsettia.  The leaves were die cut in Mossy Meadow and the berry sprig in gold foil paper. For some bling, I used the Gold Glitter Enamel Dots - I love these because they have just  hint of gold and yet are opaque enough to not over power. The card front is attached to one of the pieces of the POINSETTIA PLACE DESIGNER SERIES PAPER DSP & mounted onto Very Vanilla Thick cardstock. 

Which card do you like the best?

I cannot show pictures of the new products until tomorrow when the catalog goes live- stay tuned!   If you do not have a Demonstrator, please contact me - I would love to be your Demonstrator and get a new catalog in your hands right away!


Saturday, August 1, 2020

Reno Trip - awesome card

Today I played around with a fun fold card but didn't finish as a very fun project had been planned by our Host.  This "card" is called a Maze Card, has a lot of layers that flip over or flip up and reveal a whole different surprise view.  Below is my share:

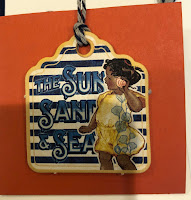
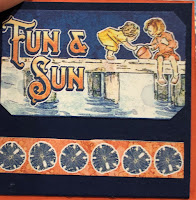
Here's a view of the front of the "Maze Book":  The papers are all from Graphick 45.
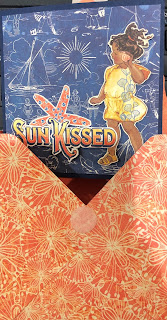
You open the book and this is the view...
Each page is folded up or down, side to side to reveal a new page until you reach the very center blank page where you can write a sentiment.  Here's the view, page by page...


And when the card is all folded up it fits into this box:


Reno Trip - Day 3: Birthday cake and more cards...

The Craft Studio has been a buzzing along; the five of us have been busy!  One person is working on an explosion box, the other 3 are Scrapbooking - one on her Alaska Trip and the other 2 on their Panama Trip.  It's been really fun to see photo pages of the places they've been.  Meanwhile, I've been working on card making.  And...my birthday celebration continued this week with:

- this card: Happy Birthday you old goat, I got you a cake...But I ate it!
  

and then, this deliciousness!  Made from scratch, rich, very dense (yum), chocolate cake and butter cream frosting with fresh raspberries.  I love, love, love raspberries and chocolate - perfection! 

All five of us were also gifted these amazing boxes, hand made by Karen.  The flower was die cut and attached to the box on a hinged piece so the "flower lid" opens & closes! The cookies were custom-made cookies were baked and decorated by the same Baker of the cake!  Each box was made in each person's favorite color and each cookie was frosted to match that person.  Notice the bandanna in my hair!  I laid them out on my desk pad with the "welcome" as received on day one - favorite color theme.  Oh, and the cookies are not only cute but they taste good too!  Thank you to Baker: Amanda Cranston and thank you to my wonderful friend, Karen!


I worked  on cards using the Playful Patterns Suite.  This "playful" suite includes the Designer Series Papers, Gems, Mini Paper Pumpkin Boxes, 3 Ribbons, those amazing small Alphabet dies plus the stamp set.  There's a lot to work with in this suite!

My 1st. Card: 
is CASED straight out of the catalog and is gorgeous.  I've had trouble finding just the right light in Karen's Studio because there's so much light that everywhere I choose includes shadows that mute out the colors.  The soft Purple Posy is a beautiful, soft Lavender.  I used the soft 2-toned coordinating ribbon, Ornate Dies, Night of Navy for the trim and I think this card is gorgeous.  What to you think?
My 2nd Card:
This card was CASED from another Demonstrator - I love her design.  I used a different twine for the balloons that were die-cut from a coordinating "Happy Dies" set.  This is a really fun set & can be used to create some very fun cards.


My 3rd Card;
What a fun card this is with the front section of the card being a 2-piece background held together by the Zebra piece!  I borrowed the darling Zany Zebra Cling Stamp Set from my friend, isn't he just too cute?


Products Used:


One more full day at our "Crop", my next set of cards will be a sneak peek on the new Poinsettia in the Holiday Mini Catalog that will be available on Monday, August 4th!  Stay tuned...

Would you like to learn more?  Would you like to have a catalog?  Would you like to know more about the Stampin" Up products?  Please contact me - I would love to be your Demonstrator if you do not currently have one!

 Disclaimer - I an a "newbie" on blogging, still learning much so please be patient with my progress!