shabby background

Thursday, December 31, 2020

Simply Succulents

Today is the very last day of the year 2020; it is also officially the last work day which opens the door to my newly found freedoms, called Retirement. With that being said, I am excited to have the time and energy to make and show you new cards. I am a Stampin’ Up Demonstrator & today I am showing you my “sneak peek” creation using the “Simply Succulents Bundle”.  


This bundle includes both the Simply Succulents stamp set plus the Potted Succulents Dies. I found my inspiration from Alisa Tilsner at www.alisatilsner.com. I love how she colored the pot and a lots of her color choices for coloring the succulents but I changed up quite a bit to get my results. 

Products I used are Stampin Blends Combo Packs in: Mossy Meadow, Old Olive, Garden Green, Smoky Slate,  plus So Saffron, Light Rocco Rose, Dark Calypso Coral, so Saffron, Dark Bronze. I do not have Rich Razzleberry so I improvised with using a small block with Rich Razzleberry ink and one of the Water Painters (filled with 70% rubbing alcohol) to get the effect on the succulent tips. The dies make cutting soo easy, they are a MUST have item! To add a bit more pizzaz, I die cut 2 times the Old Olive sprigs, cut them apart & down some & arranged in the background  

My card background is created using the largest die in the set that was adhered to the card front using wet glue.  Dimensional adhesives popped up the flower pot & succulent piece plus a few more on the sentiment to make it stand out more. Lastly, I embellished with one of my favorites: Gold Glitter Enamel Dots. These dots add just the right amount of “sparkle” and finish off the card so nicely!

I love how my card turned out, what do you think?  Would you like to have a copy of the brand new Mini Catalog that launches tomorrow??? Contact me and I will get one in your hands right away. You WILL want a catalog because our wonderful Sale-a-Bration also starts tomorrow!  You can select a nice variety of FREE items with every $50.00 purchase you make from either the Annual Catalog or the new Mini Catalog - or both! It’s such a great time if the year and a really fun time to score free products. I am totally here to help you learn new techniques & earn free stuff. 

Monday, November 30, 2020

Changes are in the Air

 Crafty Chick's Changes???

Yes, 2020 brought many changes from Covid to working from home, masks and many things in between! My largest change was transitioning in March from working in an office environment to working from home.  Yep, Monday to Thursday each week the desk in my Studio transforms from my crafting to my paying job!  Thank goodness I have a good size desk to accommodate my needs.  My next largest change will happen on December 22. 2020.  I will be ending my 20+ year employment as a Buyer for the Ventura Unified School District as I RETIRE!  I started my working career at a very young age of 12 harvesting berries in the Summer for 2 years; restaurant work followed that for the remaining teen years and through Cosmetology School.  After that, I began my 25 year Cosmetology business.  Our move from Washington State to Southern California launched me from the salon to a desk in Insurance Billing and ultimately to the School District.  It's almost surreal to think I have only 22 calendar days left until retirement and of those days, there's only 13 work days left!  I have many emotions going through my head & body ranging from excitement to nervousness as I my 10-hour workdays will be replaced with the possibility of full days in my studio doing whatever I want!  I am excited to reach out to many more people to share my craft, teach more, get lost neck deep in beautiful papers, revisit my quilting projects, and maybe some other crafts that have been "put on the shelf" for so very long!   I am anxious to grow my Cardmaking/Stampin' Up business as I learn how to make videos, hold online classes, Zoom, blog, participate in weekly challenges, and help others to expand their skills.  Look for lots of new posts and fun on this blog come January and beyond!

Speaking of Stampin' Up! - tomorrow, December 1st is the beginning for Demonstrators to order items from the new JAN-JUN 2021 Mini Catalog and SALE a-bration!                      The JAN-JUN 2021 Mini Catalog and SALE a-bration! items will be available for everyone starting Tuesday, Jan. 5, 2021. 


Stay tuned as I will be working up many cards & 3-D Items to show-off some of the very Fun and Catchy stamps & dies, punches, embossing folders, papers, accessories - OH MY!  Check back often!!!  You will have January to June for The Mini Catalog; January & February for SALE a-bration!Reminder: during all of January & February, you can earn free items from "SALE a-bration!" for every $50 you spend in either/or the Mini Catalog and the Annual Catalogs.  The Free items are available only through January & February, while supplies last.

Contact me if you would like to receive a catalog at: lyndasdesigns@hotmail.com 


Monday, August 3, 2020

Handmade For You: August - December 2020 Mini Catalog

It's here, it will be available - LIVE TOMORROW, August 4th: the "Handmade For You" Mini Catalog!  Do you need a catalog of your very own?

Here's a sneak peek of just one of the new product lines: the POINSETTIA PLACE SUITE COLLECTION which includes not only the POINSETTIA PLACE DESIGNER SERIES PAPER (DSP) but also the POINSETTIA PETALS stamp set,  POINSETTIA DIES, PLUSH POINSETTIA SPECIALTY PAPER, BEADED PEARLS, and REAL RED 3/8" (1 CM) SHEER RIBBON.

My first card features the  new RED VELVET PAPER PACK.  Stampin' Up introduced a velvet paper last year in White; this is a fun option for creating a great holiday look to your Winter cards.  I used the Poinsettia Dies to emboss the veins in both the flower and the leaves & cut out each piece.  I've used some holiday  paper from last year as my background plus the new BALMY BLUE GLIMMER PAPER, plus Mossy Meadow, Real Red, & Whisper White cardstocks,  Each piece & layer of the Poinsettia was hand-shaped & adhered together, then adhered to a piece of thick Vellum.  This card front was then adhered to Whisper White Thick cardstock.  I love the texture and dimension of this card!


My next card came as I took a peek to see what other Demonstrators were doing with this set, this is my creation.  I've gold embossed on Very Vanilla cardstock using the Poinsettia Stamp set & die cut using the Poinsettia Dies.  Net, I shaped the flowers/leaves and created the center by using the Dark Mango Melody Blends to color pearls and adhering them to my Poinsettia.  The leaves were die cut in Mossy Meadow and the berry sprig in gold foil paper. For some bling, I used the Gold Glitter Enamel Dots - I love these because they have just  hint of gold and yet are opaque enough to not over power. The card front is attached to one of the pieces of the POINSETTIA PLACE DESIGNER SERIES PAPER DSP & mounted onto Very Vanilla Thick cardstock. 

Which card do you like the best?

I cannot show pictures of the new products until tomorrow when the catalog goes live- stay tuned!   If you do not have a Demonstrator, please contact me - I would love to be your Demonstrator and get a new catalog in your hands right away!


Saturday, August 1, 2020

Reno Trip - awesome card

Today I played around with a fun fold card but didn't finish as a very fun project had been planned by our Host.  This "card" is called a Maze Card, has a lot of layers that flip over or flip up and reveal a whole different surprise view.  Below is my share:

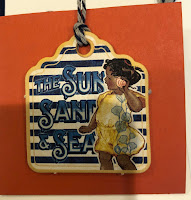
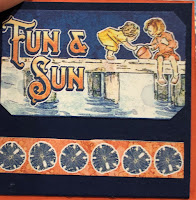
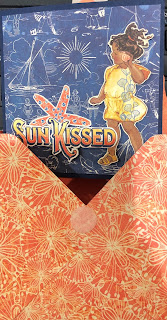
Here's a view of the front of the "Maze Book":  The papers are all from Graphick 45.
You open the book and this is the view...
Each page is folded up or down, side to side to reveal a new page until you reach the very center blank page where you can write a sentiment.  Here's the view, page by page...


And when the card is all folded up it fits into this box:


Reno Trip - Day 3: Birthday cake and more cards...

The Craft Studio has been a buzzing along; the five of us have been busy!  One person is working on an explosion box, the other 3 are Scrapbooking - one on her Alaska Trip and the other 2 on their Panama Trip.  It's been really fun to see photo pages of the places they've been.  Meanwhile, I've been working on card making.  And...my birthday celebration continued this week with:

- this card: Happy Birthday you old goat, I got you a cake...But I ate it!
  

and then, this deliciousness!  Made from scratch, rich, very dense (yum), chocolate cake and butter cream frosting with fresh raspberries.  I love, love, love raspberries and chocolate - perfection! 

All five of us were also gifted these amazing boxes, hand made by Karen.  The flower was die cut and attached to the box on a hinged piece so the "flower lid" opens & closes! The cookies were custom-made cookies were baked and decorated by the same Baker of the cake!  Each box was made in each person's favorite color and each cookie was frosted to match that person.  Notice the bandanna in my hair!  I laid them out on my desk pad with the "welcome" as received on day one - favorite color theme.  Oh, and the cookies are not only cute but they taste good too!  Thank you to Baker: Amanda Cranston and thank you to my wonderful friend, Karen!


I worked  on cards using the Playful Patterns Suite.  This "playful" suite includes the Designer Series Papers, Gems, Mini Paper Pumpkin Boxes, 3 Ribbons, those amazing small Alphabet dies plus the stamp set.  There's a lot to work with in this suite!

My 1st. Card: 
is CASED straight out of the catalog and is gorgeous.  I've had trouble finding just the right light in Karen's Studio because there's so much light that everywhere I choose includes shadows that mute out the colors.  The soft Purple Posy is a beautiful, soft Lavender.  I used the soft 2-toned coordinating ribbon, Ornate Dies, Night of Navy for the trim and I think this card is gorgeous.  What to you think?
My 2nd Card:
This card was CASED from another Demonstrator - I love her design.  I used a different twine for the balloons that were die-cut from a coordinating "Happy Dies" set.  This is a really fun set & can be used to create some very fun cards.


My 3rd Card;
What a fun card this is with the front section of the card being a 2-piece background held together by the Zebra piece!  I borrowed the darling Zany Zebra Cling Stamp Set from my friend, isn't he just too cute?


Products Used:


One more full day at our "Crop", my next set of cards will be a sneak peek on the new Poinsettia in the Holiday Mini Catalog that will be available on Monday, August 4th!  Stay tuned...

Would you like to learn more?  Would you like to have a catalog?  Would you like to know more about the Stampin" Up products?  Please contact me - I would love to be your Demonstrator if you do not currently have one!

 Disclaimer - I an a "newbie" on blogging, still learning much so please be patient with my progress!

Friday, July 31, 2020

Reno Trip - Pampered Pets

Playful Pets Suite Collection

Today’s focus was using the adorable Playful Pets Suite Collcection.  This Suite includes the Designer Series Paper (DSP), Dies, set of Two trims, and the cutest trinkets that include both a dog bone and a heart.


My 1st. card was CASED from Sam Drummond, a UK Demonstrator, and is as cute as can be!  This card design is called a Double Z Card, named for the two folded pieces of cardstock that fit together like a “Z”.  I used the paw print & hearts DSP as my background. The adorable dog was stamped on Whisper White cardstock & colored her using our SU Blends alcohol pens in both light and dark Smoky Slate.  Next I die cut the dog with the die included in the Die set- yeah, no fussy cutting!  I also stanped & fussy-cut the food bowl.  The red bow is made with the coordinating ribbon from the Suite.


My 2nd card features one of the cats in the Designer Series Paper (DSP) that I fussy cut with my paper snips; this one is a precious, sweet kitty wearing one of the little heart shaped trinkets "around" her neck.  The little fish & heart paper is a perfect match along with the strip with the wording: jump, love, meow, love, purr, etc.  I also cut the mouse and ball of yarn peeking out on the bottom right of the card.  The 3 white hearts were rescued from the paw print die used on the card below!

My 3rd Card: is another of the cats from the DSP and more of the fish & heart DSP.  This time I used the little 3-paw print die and backed them with some Real Red card stock.  The Real Red ribbon is part of the Suite Collection.  My sentiment is taken from a retired Beautiful You stamp set.

Here is are pictures of everything that comes in the Playful Pets Suite Collection: