Before
and after…
I posted the above “hot mess” earlier with an invitation to come back later to see what I would do. I present the many, many leaves cut out from the hot mess plus several@other from solid card stock. Pretty cool, right?

Before
and after…
I posted the above “hot mess” earlier with an invitation to come back later to see what I would do. I present the many, many leaves cut out from the hot mess plus several@other from solid card stock. Pretty cool, right?

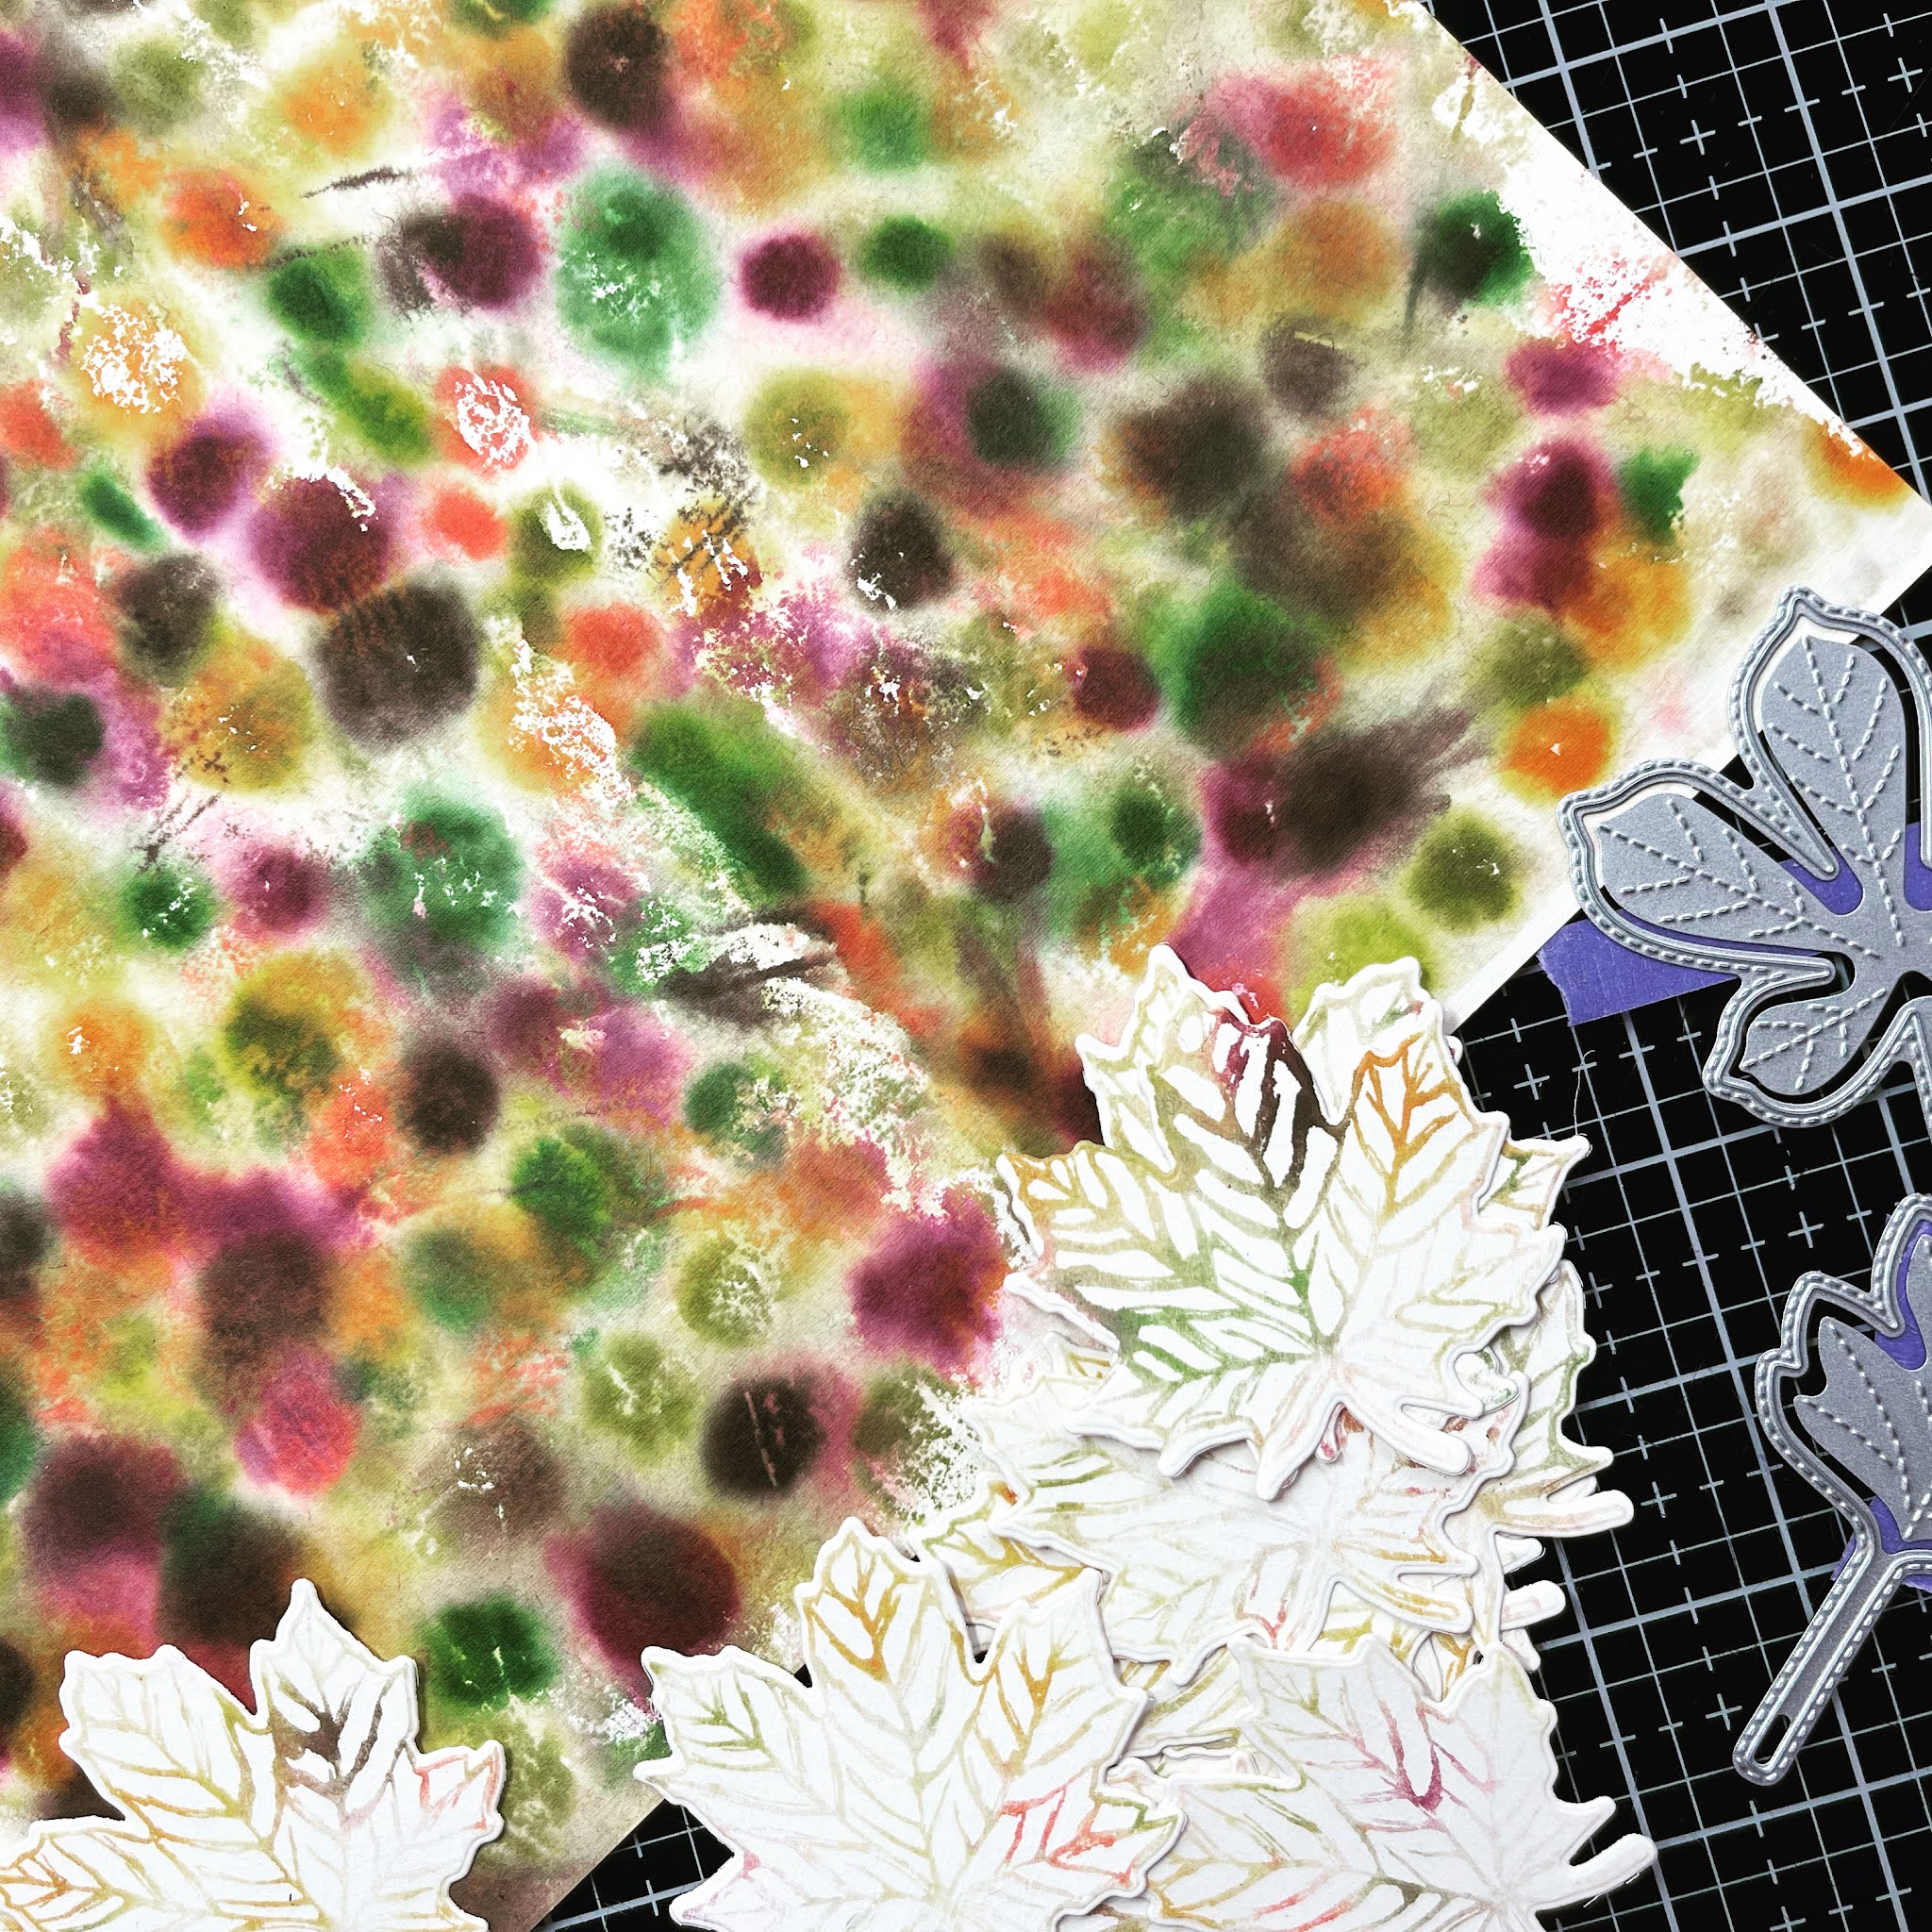
I am working on pieces & parts for our Church September Bulletin Board!
Leaves, leaves, leaves -changing colors, falling to the ground, floating through the air welcoming the Autumn Season. Doesn’t this look like a “hot mess”? I used the baby wipe method for stamping only this time I made a big pallet and colored the entire sheet of paper. Once the paper fully dries, I will cut out leaves from the “Stitches Leaves” Dies (pictured). After coloring 3 sheets of cardstock, I misted water on my pallet and used the leaf stamp from “Gather Together” to create & cut a bunch of leaves. I plan to add some additional color.
Check back later to see the end results…see what gorgeous-ness this hit mess transforms into…
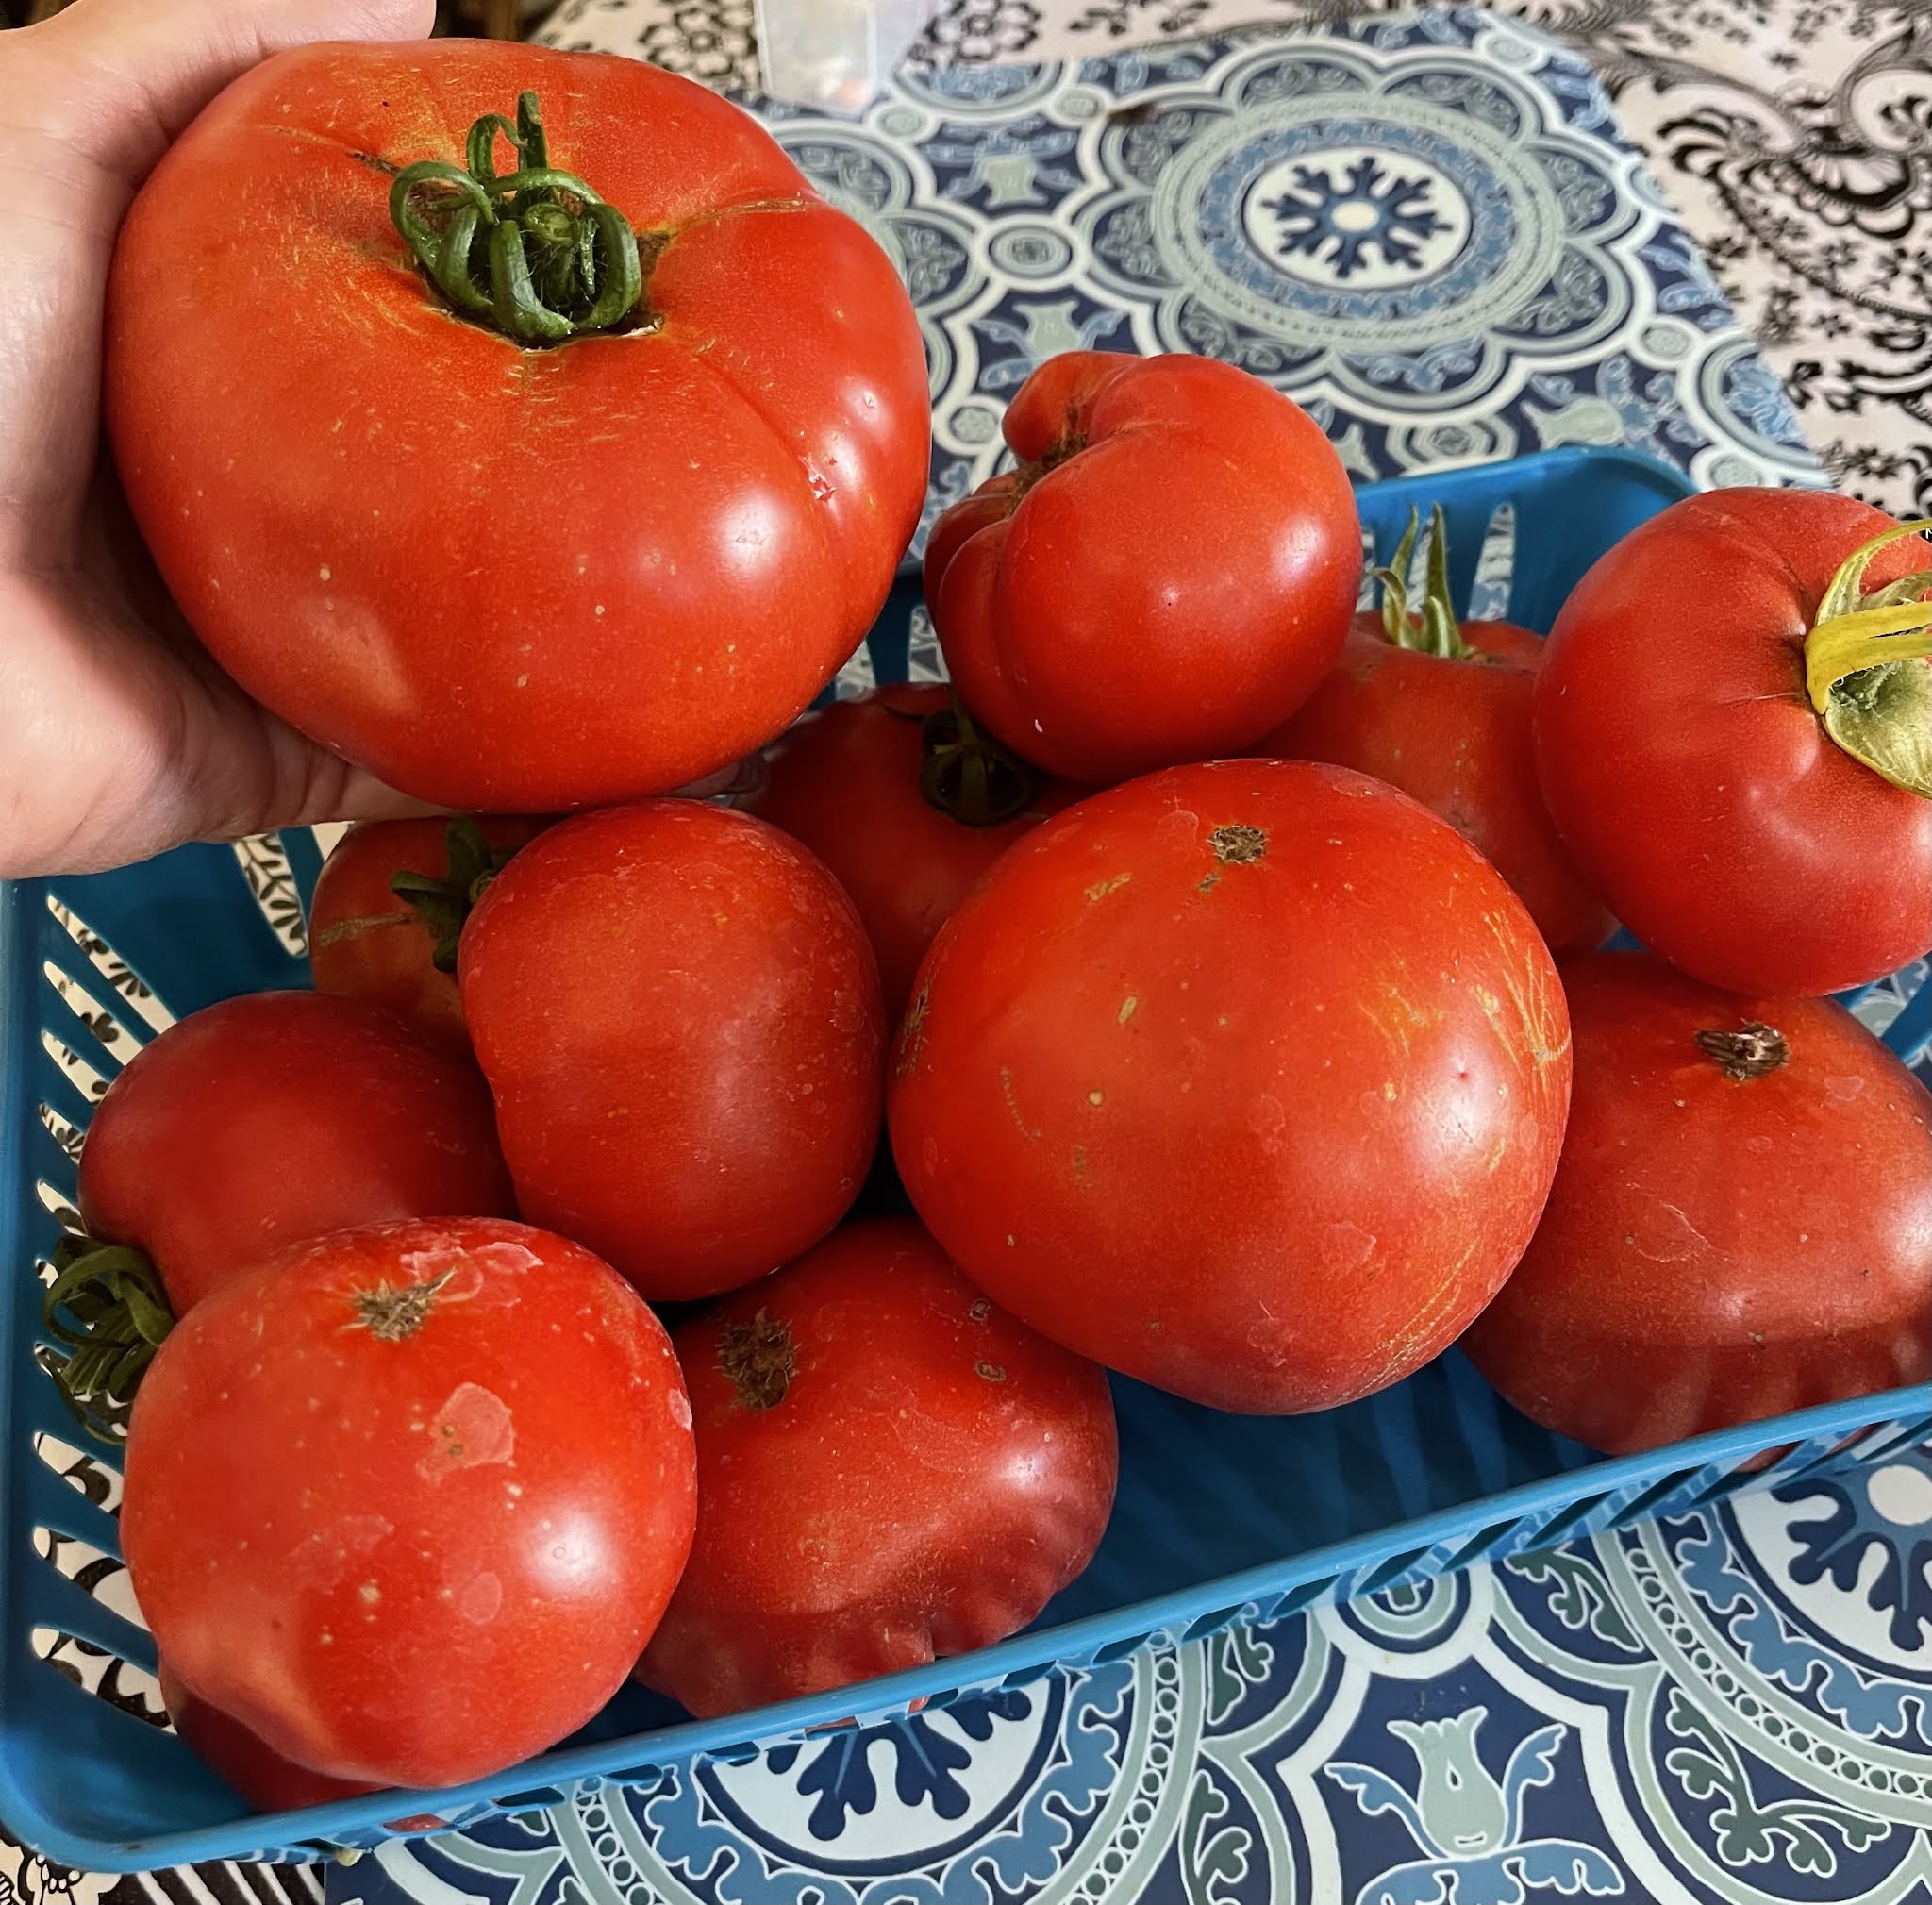
Proud gardener time! I don’t believe I’ve ever grown a tomato this size. We have been enjoying sliced tomatoes for dinner a lot the last 2 weeks-YUM!

This is my card entry for this week’s Tic Tac Toe Challenge. I chose the middle row across

I used some of the new Stampin’ Up “Cute Halloween” 6” x 6” Designer Series Paper & new Gingham Ribbon along with last year’s “Cobwebs 3D” Embossing folder & bat dies from “Halloween Magic”. My sentiment is from an older Paper Pumpkin Kit; the skull & bat embellishments are from my stash.
And here’s my card:

Been a busy morning getting 5 cards made to go out in the mail today. The papers are all Older Stampin’ Up as are the embellishments, dies & inks. #stampinup the sentiments are from a Ranger’s “Sat it how it is” set DYR37774 #rangerink
All done & feeling so gratified!


Today’s card started out completely different than what I originally intended. I literally hated the first idea & threw it in the trash. I’d tried some embossing paste on a stencil that stuck so much my cardstock ripped in several places when removing the stencil -raving pieces stuck to the stencil & a big mess. UGH!
Second attempt, same stencil/mask and a whole new idea later, I created this sweet Christmas Snowflake Mini Slimline Card. for my card front, I started with a piece of Basic White Cardstock (#159276) cut at 6” x 6-1/2” plus One of the Adorning Designs Decorative Masks (#156328) from the Jul-Dec Mini Catalog. I used Smoky Slate Ink (#147113) plus a Blending Brush (#153611), and very lightly colored in the tops of several snowflakes. Next I used Balmy Blue Ink (#147105) filling in the remaking snowflakes. To add some sparkle, I used some Colorbox Silver Pigment Ink on some of the snowflake centers. I adhered this card front to the Basic Gray sheet from the Silver Foil 12x12 Specialty Pack(#156457) that was cut at 6-1/8” x 3-3/8”. I die-cut the spray of snowflakes from the retired Snowfall Thinlits Dies (#149742) plus Three single snowflakes, arranged them & then adhered to the card front using liquid glue. Next, I used one of my favorite ribbons, wrapping around the card base & tied in a simple square knot; the ribbon is: the 1-1/2” Metallic Mesh Ribbon (#153550). Last, but not least, I added some “bling” using some Opal Rounds (#154289) and some Pearl Basic Jewels (#144219). I do love me some pretties!
The card front was popped up & adhered using Foam Adhesive Strips (#141825) a piece of Balmy Blue Cardstock (#146982) that was cut at 6” x 6-3/4”, scored at 3-3/8”.
The sentiment is from Poinsettia Petals (#153475), stamped in Memento Black Ink onto a scrap of Balmy Blue cardstock & fussy-cut using my Paper Snips Scissors ((#103579). The sentiment is adhered to a backing that consists of a piece of white cardstock cut at 3-1/16” x 11/16” adhered to a small piece of the Silver Foil cut at 3-1/4” x 11/16”. The sentiment is popped up with Stampin’ Dimensionals (#104430) to stick down on either side of the ribbon knot.
I think this is a sweet little Christmas card, what do you think? Do you like slimline cards, do you like the mini slimline version, have you made any slimline cards yet?
Do you like what you see? Do you have the catalogs? Do you want to earn some Sale-A-a ration FREE items with purchase? Contact me, I am here to help you get some of these or other Stampin’ Up supplies in your hands and in your craft space! lyndasdesigns@hotmail.com


This card has been created using the Peaceful Prints Designer Series Paper that you can get FREE with purchase! The package includes 2 each of 6 double-sides designs.
I cut the reindeer circle shape straight from the paper twice-once for the reindeer piece & a larger circle for the red/black check. Then the scallop border was cut from black card stock. I cut the black snowflakes from Snowfall Thinlit dies from my stash, stamped the sentiment from Poinsettia Petals stamp set in the Annual Catalog, black pearls, and the Real Ref Ruffled Ribbon from the new Mini Catalog. A little watercolor splattering in black & a cute card is born!
Would you like to earn this paper for FREE? Contact me & I’ll show you how.

For my card base, I used Magenta Madness, the DSP is Flowers For Every Season, some older pearls from my stash, I used the 3rd & 4th largest Circle Dies, and the Country Floral Embossing Folder. The tags were cut from Hydrangea & Meadow Dies that were tied up with some waxy flax twine. Again, thanks to Lorraine!
Hello & welcome to my blog!
Today’s card started with the Happy Birthday Die, that scrap of Stampin’ Up Designer Series Paper, & the card stock laying on my desk from yesterday! (I really do hate wasting or throwing away) So, once again I challenged myself to create with what was there. I grabbed a few more supplies including Stampin’ Up products: the Hammered Embossing Folder, a bit more card stock, sequins, & a piece of clear acetate for the window, plus some foam tape and proceeded to create this fun “shaker” BD Card.
What do you think? Hopefully some luck person will get this cute card soon!
***I sure wish I can figure out soon why the colors in my photo change from brilliant on my phone, FB an Instagram to dull on my blog. If you have any clues, please let me know!


A friend gifted the darling cross stitch die/hoop to me last week. I had a 90th BD card to make so I used the die, did the stitching, added in another die from my stash plus some of my Stampin’ Up DSP and came up with this cutie. What do you think?
